
Magnetic 3D Printing Heatbed
Here you will learn how you too can manage to add a magnetic heating bed to your 3D printer.
Magnetic heatbeds have not only been in use since the release of the Prusa i3 MK3 by PRUSA Research, but for some time now. At our first Ruhrgebi3D meeting in March 2016, one participant had already built such a heatbed and, strangely enough, the rest of us never really implemented it. Until now!
This post is first based on my observations that I have made with friends. I'll write down for you what was done to achieve the goal. Then I'll sit down later myself and put the whole thing into one of my 3D printers. So far, there are two DIY paths that lead to Rome.
This way, I can once again answer questions that might also occur to you.
Let's get started.
What do I hope to achieve with the conversion?
You may be asking yourself,“What is he up to now?”
These lines here should bring a little light into the darkness. It happens from time to time that I print large objects. By this I don't necessarily mean tall objects, but those that take up almost the entire heating bed. Despite the use of Pertinax, it sometimes happens that the object does not lift off the plate after cooling. Actually, it happens, but in some circumstances, unfortunately, it does not. If the appearance is also important, it will be difficult to find a suitable “point of attack” to get underneath with a good scraper. Unfortunately, the spots don't look so great then. In addition, the bed is then misaligned by the rumgespiele and well, such stupid moments I want to spare me and you in the future.
With a magnetic heatbed, it is therefore possible to detach the printing surface from the actual heatbed. If the print surface is now not rigid but flexible, I can release the object with a small rotation – without tools. It also has the further advantage that if I have several plates prepared, I can simply attach the next one and start another print. So, waiting for it to cool down is also eliminated. With a heating bed in CR10 size the heating up lasts otherwise again eternities, particularly since I must DRINGEND again to it.
As you can see, it already has a purpose.
Well.
Go.
It.
Go.
Magnetic heating bed – variant 1
This variant describes the setup with several magnets and an iron foil. The application of a permanent pressure plate such as Pertinax is not described here. However, you can read about this in the corresponding article“Pertinax as a 3D printing substrate / permanent printing plate” and apply it to this. If questions arise, just ask 🙂
Required tools for the construction of a magnetic heating bed
Assuming I don't put a permanent pressure plate on here, I don't need any tools for the conversion.
(Unless…)
Required work equipment
(…your spring steel plate does not have the dimensions of your heatbed. Then you might need a flex 😉 )
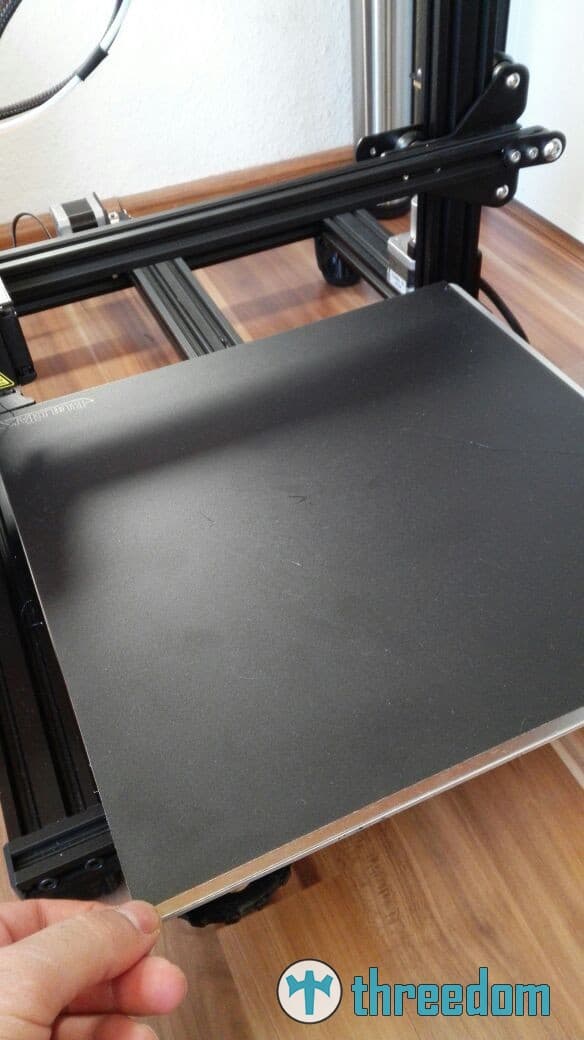
Spring steel plate
Why spring steel? Prusa's i3 MK3 also has spring steel and the advantage in this is that the material “can bend but pulls back like a spring”. *O-Ton Mister X*. For more expert information, I recommend you read the article Spring Steel on Wikipedia.
Here, a plate with a thickness of 1mm was initially purchased and is also in use. Which unfortunately turned out to be a bit “too much”. Spring steel is actually a very great material. Even with a thickness of 1 mm, you have to apply some force to bend the material slightly.
Therefore, in the future, I and my tipster will also use (thanks for your mistakes) material with a thickness of 0.5 mm.
You can purchase 0.5 mm thick“1.4310 CrNi spring steel” in this ebay shop*– search for your desired dimensions here or have it cut to size there. It works relatively unbureaucratically and quickly. For the Creality3D CR10 S about 32€ were due (Consider: With 1 mm thickness!)
Magnets
In this case, the following neo…
“Wait a minute! They demagnetize at a certain temperature!!!”
No issue 🙂
These neodymium magnets from Maqna are not 0815 neodymium magnets, which do not hold relatively quickly when heated with a hot air gun. They are designed for temperatures up to 150°C. Price per piece? approx. 0,8€
For the CR10 S, my contact uses over 30. I will order some more. Surely I can use these for further conversions and at the price it doesn't hurt soo much.
Here again the hint: These are not toys with an adhesive force of almost 3kg! Furthermore, please keep in mind the typical dangers of using pacemakers etc. at the same time. – As my reader you don't know it any different 😉
Insulating tape
The heating bed conducts electricity. To prevent a short circuit, please have some insulating tape or similar ready.
Structure of the magnetic heating bed in variant 1
If you were expecting a spectacle, I'm sorry to disappoint you. Actually, it's quite simple.
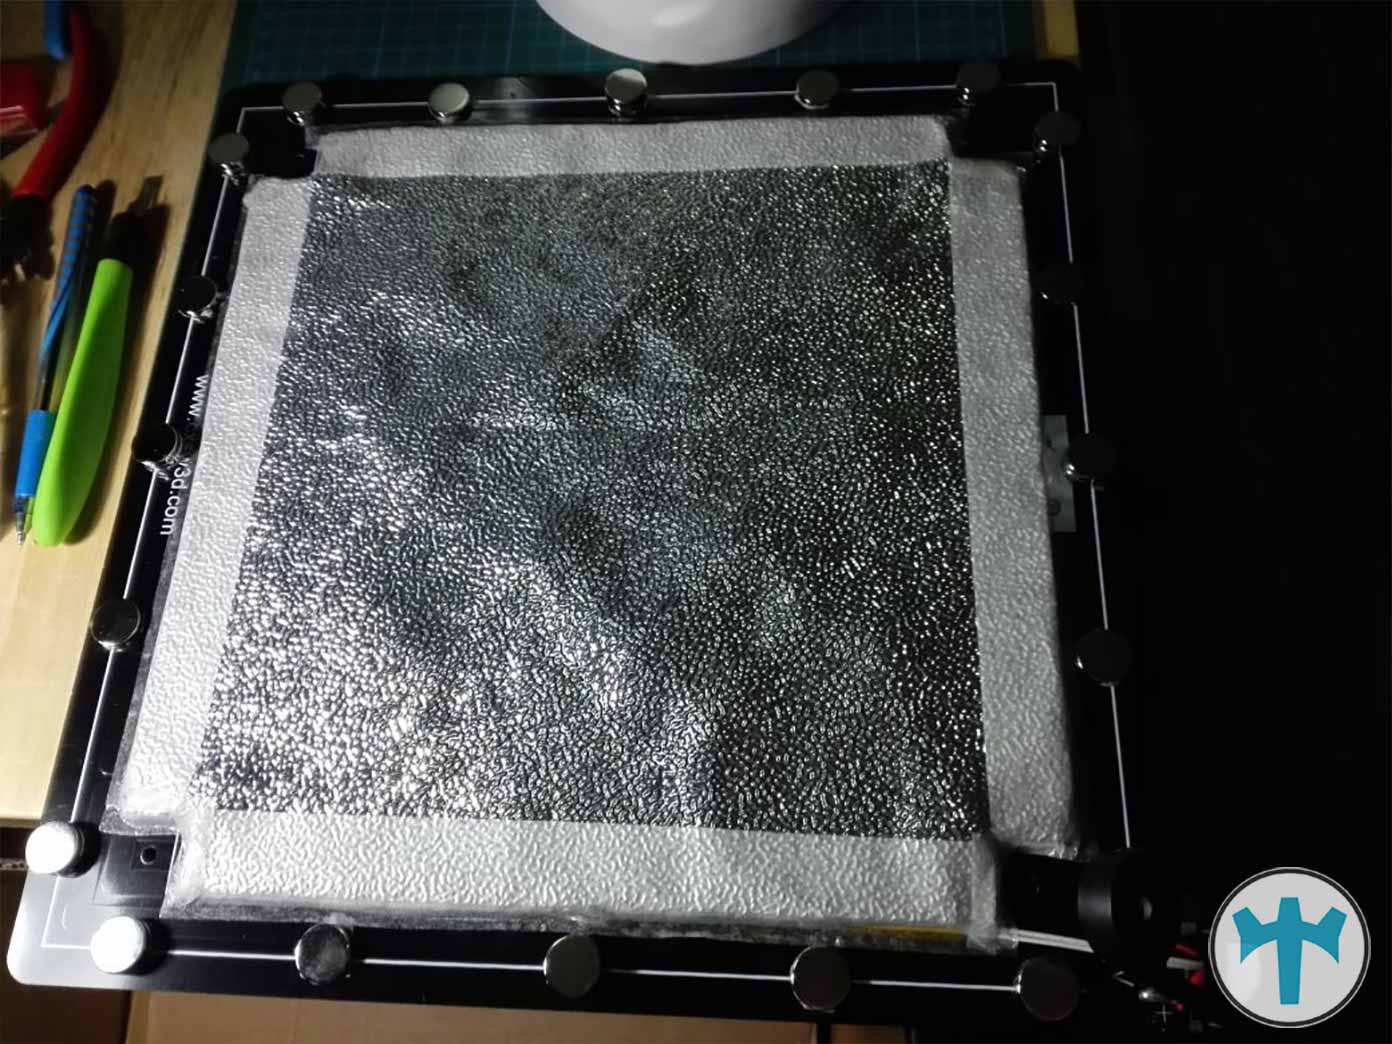
(Remove the old printing surface)
Does it stick? Use fishing line*(please don't ask me why I chose trout with my order) to get between the heating bed and the printing surface. You can pave your way with slow movements. Unfortunately, you then have to remove the adhesive residue – works quite well with isopropanol*.
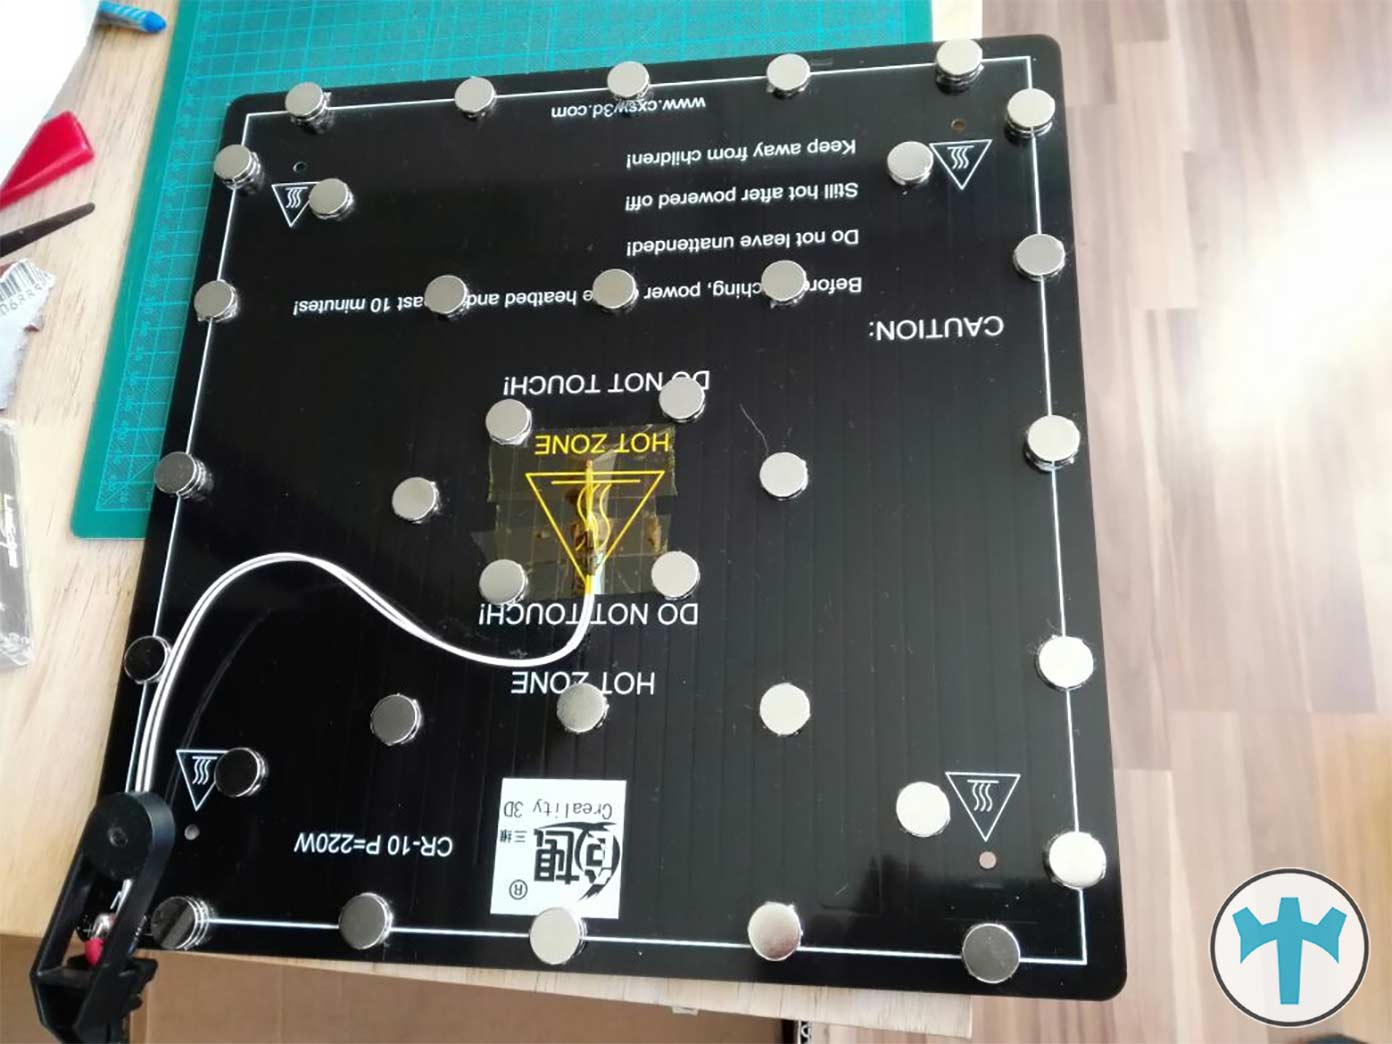
Stick insulating tape to the magnets
Please stick insulating tape (heat resistant – Kapton* works too) to the surface of the magnets that will be in contact with the heating bed.
Attach magnets
Now attach the magnets to the heating bed from below (with the insulated surface facing up!). Make sure that it is evenly distributed over the entire surface of the heating bed. This is important in that we do not want the corners of the spring steel plate to lift up later.
Attach permanent pressure plate to the spring steel plate
If you have Pertinax or another surface on site, please attach it. (Once again: The instructions for Pertinax)
Test and use spring steel plate
Now place the spring steel plate on the heating bed and check whether the corners bulge upwards or similar. – Where this occurs, you can insert additional magnets. With the 1 mm thick plate, this was more difficult to manage, which is why I only buy the 0.5 variant.
Ready!
After this conversion you will be able to print more efficiently. Especially if you are a power printer, you can use this nicely to save a lot of time.
The next step towards full automation is thus done 😉
Have fun with the replica!
(Variant 2 follows!)