
Cura from Ultimaker – Free slicer with a long tradition
 Especially in the beginning, the experts will throw so many terms and software names at you that you won't know where the front and back ends are. In this post for the 3D Printing Guide, I introduce you to the Slicer Cura from Ultimaker. In the process, you'll learn how to get started with Slicer and how to prepare your first print.
Ultimaker Cura What is it and how do I install this slicer?
Cura is a printing software or slicing software that offers the possibility to convert a digital file located on the computer into a format(G-code) that the 3D printer understands. In the process, it cuts a 3D model into layers.
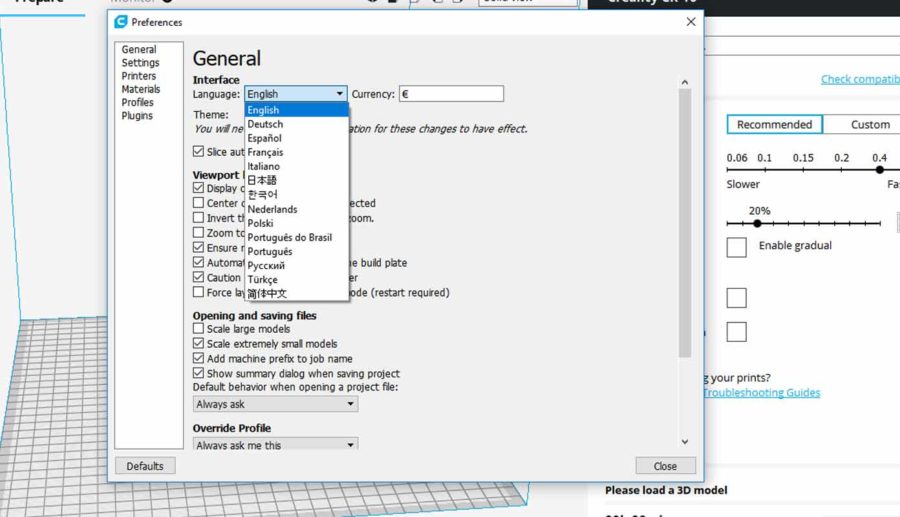
The software is offered free of charge as open source by the Dutch 3D printer manufacturer Ultimaker B. V. and a huge Cura community, and is regularly maintained. It allows you to revert to default settings as well as tinker with the 3D printer settings. In the language settings, you can switch from English to German, which of course makes it much easier for you to use. In this post, I'll cover Ultimaker Cura version 3.2.1. If something changes fundamentally in the next versions, the post will certainly be revised 🙂
In general, 3D printing is divided into three stages. These include
- the modeling,
- the 3D file export and
- cutting file exports.
When modeling – for example with the programs 123D Design or Autodesk Fusion 360 – they generate their own file format, which can also be exported. So, once the model has been created, it must be exported to an STL, OBJ or 3MF file. These three formats are recognized by Cura.
What can the Cura Slicer do?
The Cura software recognizes the STL, OBJ and 3MF files, cuts them and outputs them as G-code, which in turn can be read and processed by the 3D printer. If you want to do without modeling, you can download print-ready models from websites such as Thingiverse, MyMiniFactory or Instructables, which are then imported directly into the Cura application.
If the 3D printers work with Fused Deposition Modeling (FDM), the Cura Slicer determines how the layers of the desired 3D model are placed on the print bed and creates instructions (G-codes) for the 3D printer on this basis. How exactly the G-code is generated, you can read in this article.
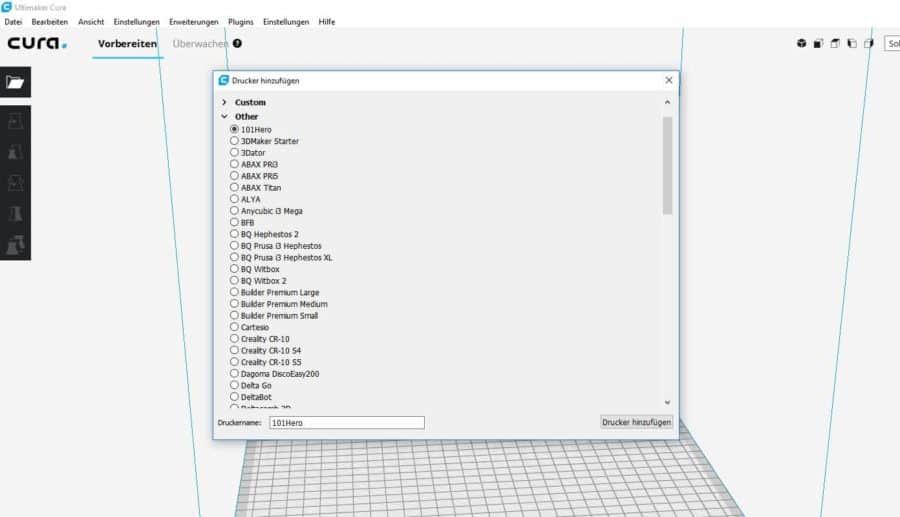
Since each 3D printer kit and also ready-to-use printer has different equipment and configuration, Ultimaker Cura needs to know each hardware details. For this reason, the software already asks which 3D printer model will be used when it is set up. If the data are available, the layer height and thickness, but also other parameters can then be changed.
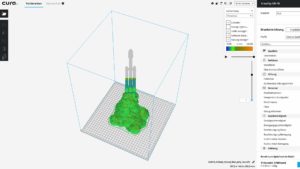
Like I'm sure most other 3D printing software programs, Cura allows you to change the angle of view of the build space. For this purpose, the creation area can be moved, reduced and enlarged. To navigate in the build area of Cura, just hold down the shift key and click the left mouse button. To rotate the build area, press the Ctrl key and left-click in the build area. On Ubuntu and Mac, it is even sufficient to press the left mouse button and drag at the same time. You can enlarge the building area by using the scroll wheel of your mouse.
What are the special features of the Cura Slicer?
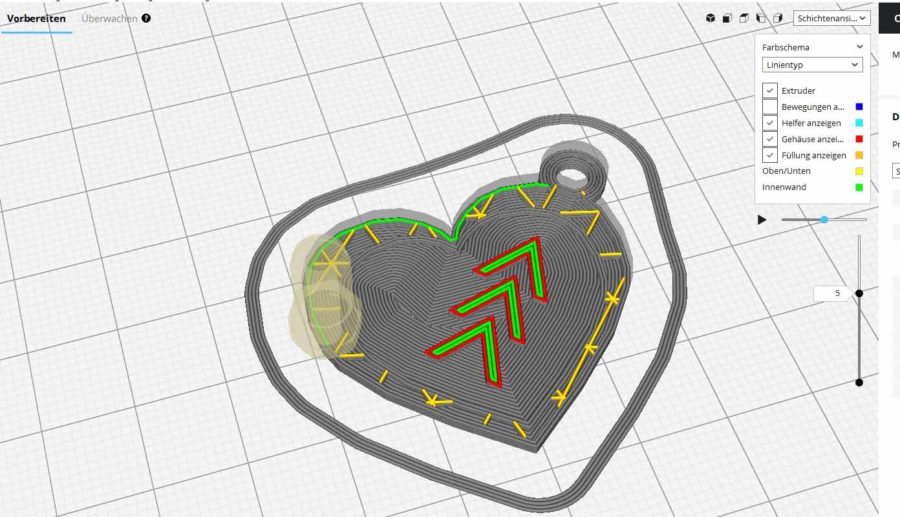
Cura Slicer allows to view models in three different versions. The default view is Solid View. With the X-ray function, you can see where reworking is needed. If an object has errors at any point, you should switch to the layer view. Use the arrow keys or a slider to move over all the layers on the screen. You can also determine settings that you might want to change later, such as the layer height, the fan power or the filament flow.
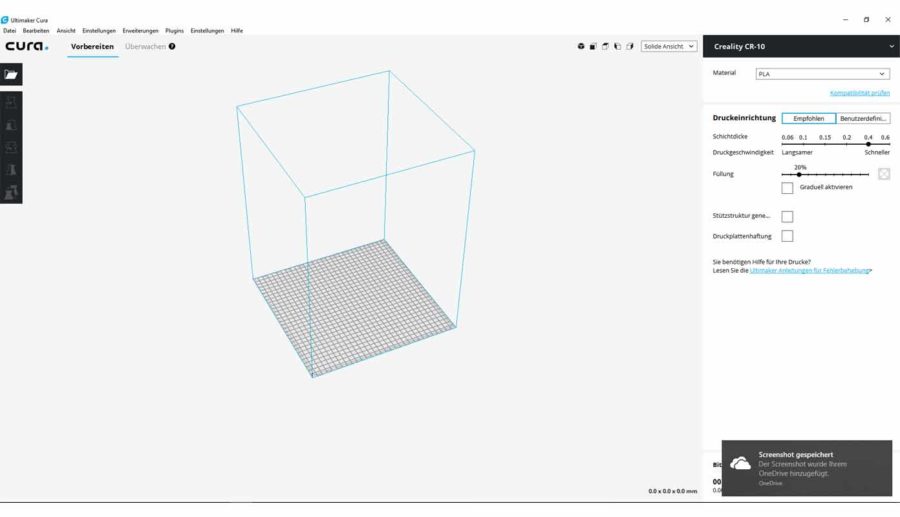
Particularly important is the Cura settings window at the top right edge. Here you can select, among other things, the printer settings, the filament used, the layer height and the fill densityInfill). At the same time there is a possibility to adjust the filling (support). If the model has no overhangs, the support can be deactivated.
Once the settings have been adjusted, the model can be printed. For this purpose, the data is either transferred from Cura to an SD card or sent directly to the 3D printer. At the same time, the software provides a time estimate for 3D printing. Now the print command can be clicked or the SD card can be inserted into the designated slot of the 3D printer. I will go into this in more detail below.
Very important are the custom settings. These are divided into the sections
- Quality,
- Housing,
- Filling,
- Material,
- Speed,
- Cooling,
- Support structure,
- Printing plate adhesion and
- Special functions
subdivided.
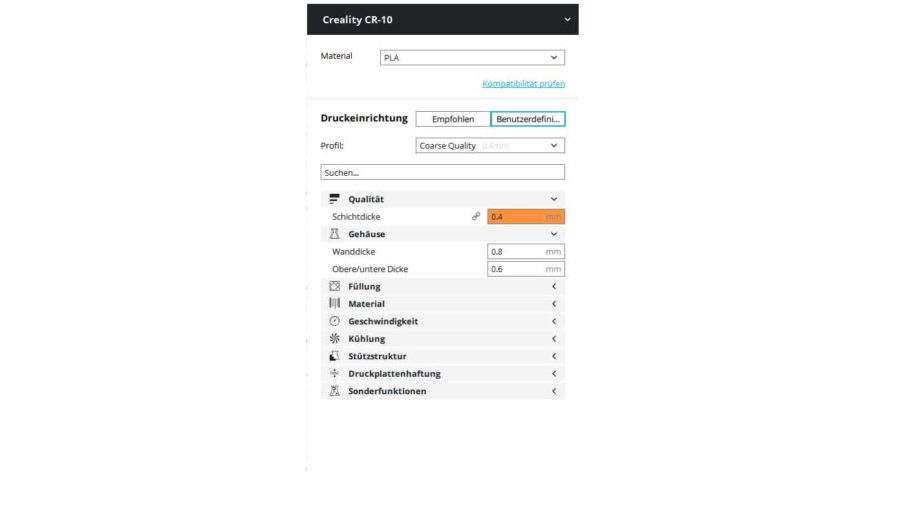
Another section is the hidden settings. To do this, click on the gear icon next to the relevant section heading. A total of about 150 different setting options can be found there.
Download and installation
Ultimaker Cura software is compatible with both Microsoft Windows (Windows Vista and above), Mac (Mac OSX 10.7 and above), Linux and Ubuntu (Ubuntu 14.04 and above).
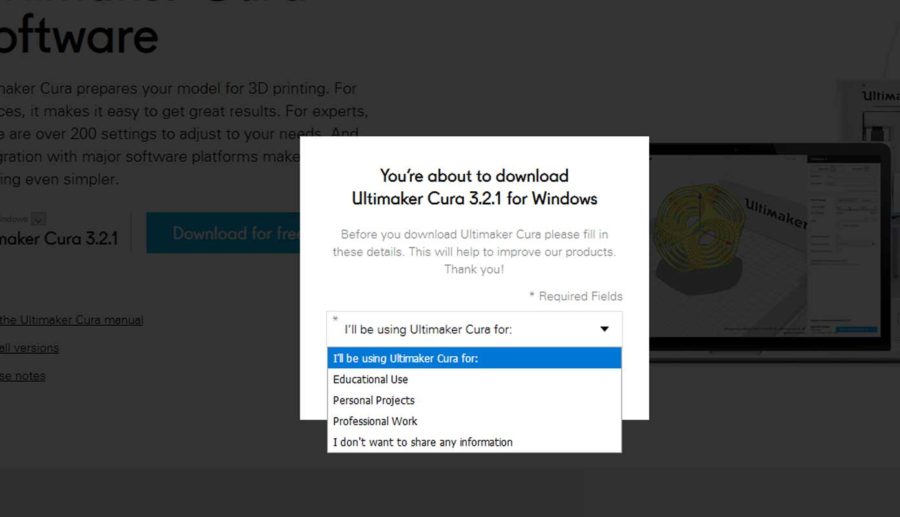
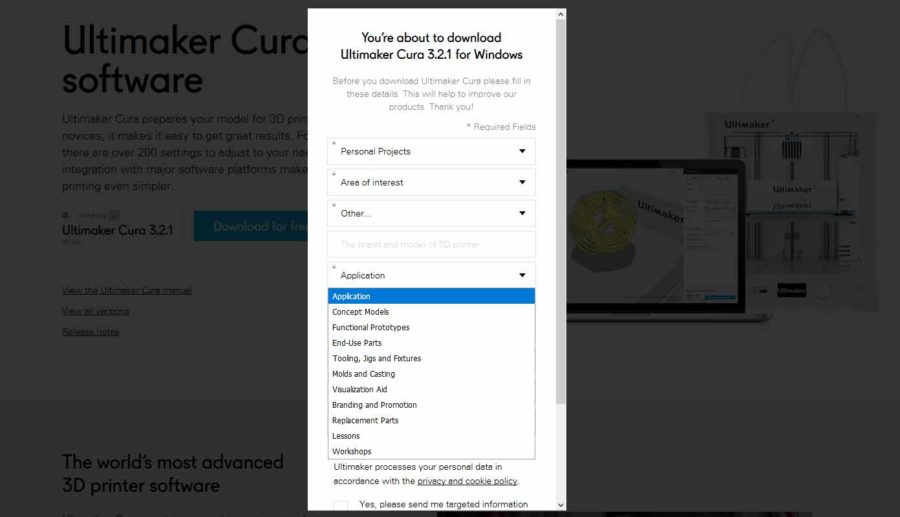
On this web page you will find the button to download Cura Slicer software for free. If you click on it, the system will first ask you what you want to use Cura for. As selection appear here (in English language) the areas
- Educational Use,
- Personal projects,
- Professional use and
- I do not want to disclose any information.
Note: If you select the last item, there will be no disadvantages for you. However, if you would like to help out a little in the name of statistics, feel free to select other items to suit your purpose.
If you choose to select “Personal Projects,” you will be asked about the area of interest. These include among others
- Art,
- Board games,
- Electronics,
- Engineering,
- Fashion,
- Model making,
- Do-it-yourself and hobby.
In the next step you will be asked to select the main printer. Ultimaker Cura already has an extensive model list ready for this purpose. However, you will find some of them only under the “Others” section.
Finally, you will be asked about your preferred application. This includes, but is not limited to, the production of concept models, functional prototypes, parts for final use, for molding and casting, the production of spare parts, and use for teaching or workshops. Now you just need to choose your country, enter your name and email address. Once you have done this, the software will be downloaded to your computer.
If you click on the download arrow at the top right of the screen and double-click on the downloaded file, the installation wizard will open. This asks you to select the destination directory, specify the Start Menu folder and select the desired components. Usually you can stay with the default settings and then click install.
Tip
When you open the software for the first time and click on “Configuration”, you can select the German language version instead of the English language.
Cura quick start
Many 3D printer manufacturers have already provided a link to the pre-configured version of the Cura software for the corresponding printer model on their company website. This makes the installation of the software even easier.
Once the installer has been downloaded, follow its instructions. When starting the software, a wizard helps to configure it correctly for the respective 3D printer. It may be necessary to select the “Other” option before you have to choose the predefined print profile again. After that you will see on the computer that the assistance has been successfully completed. Now you can start using the software.
On the screen, you will see a radio button on the right side, while the three-dimensional workspace is on the left. The latter has the same dimensions as your 3D printer. Here you have the possibility to inspect the uploaded or self-designed 3D model, move, rotate and scale parts.
If you are not so experienced in self-construction or generally like to use prefabricated data, you can look for objects you want to realize on websites such as Thingiverse, MyMiniFactory or Instructables and download the files to your computer. ➡ Check out the“3D Printer Templates” post on this.
Load a file and save it to SD card
To upload a file, either go to File and here Open file or click on the folder icon in the upper left corner and then select the corresponding file on your computer. You can then also edit them on your computer.
If you want to transfer the data via SD card, insert it into your PC. Then an SD card icon will appear on the left side of the workspace. At the same time, you will also find information about the required length of the filament and its weight in grams. Once the data has been saved, the SD card can be removed and inserted into the 3D printer. To do this, go to “Print from SD” in the printer's control panel and then select the file you have created.
Short insertion: You can also save your projects additionally as .curaproject file and have, so to speak, all settings of the project always at hand for possible optimization loops.
If you haven't already done so, all you have to do now is insert the appropriate filament and then you can start your first 3D print.
You probably won't be completely satisfied, especially with the first print. Therefore, it is useful to change only one or two settings in the software to get an eye for what effect this has on the quality. Over time, you'll become more confident this way.
And if you are interested in 3D printing but don't own a 3D printer yourself yet, I recommend the two articles ➡ 3D printer kit and 3D printer – ready-to-use printer.