
Stereolithography (SLA) – What is the SLA process?
In this article, I introduce stereolithography – or the SLA process for short. You will learn about the structure of an SLA printer, get to know the principle of operation and also the advantages and disadvantages.
When was the stereolithography process invented?
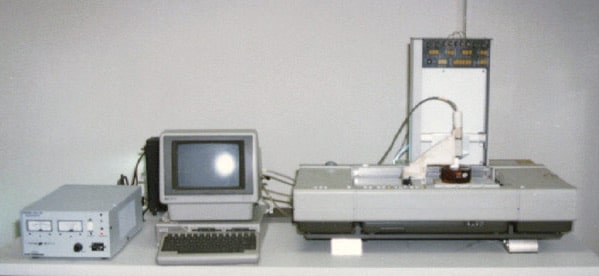
The stereolithography process was invented by Charles “Chuck” W. Hull in 1983 and patented in 1986. Hull founded the company 3D System based on this invention in order to be able to market the technology.
How is an SLA-3D printer constructed?
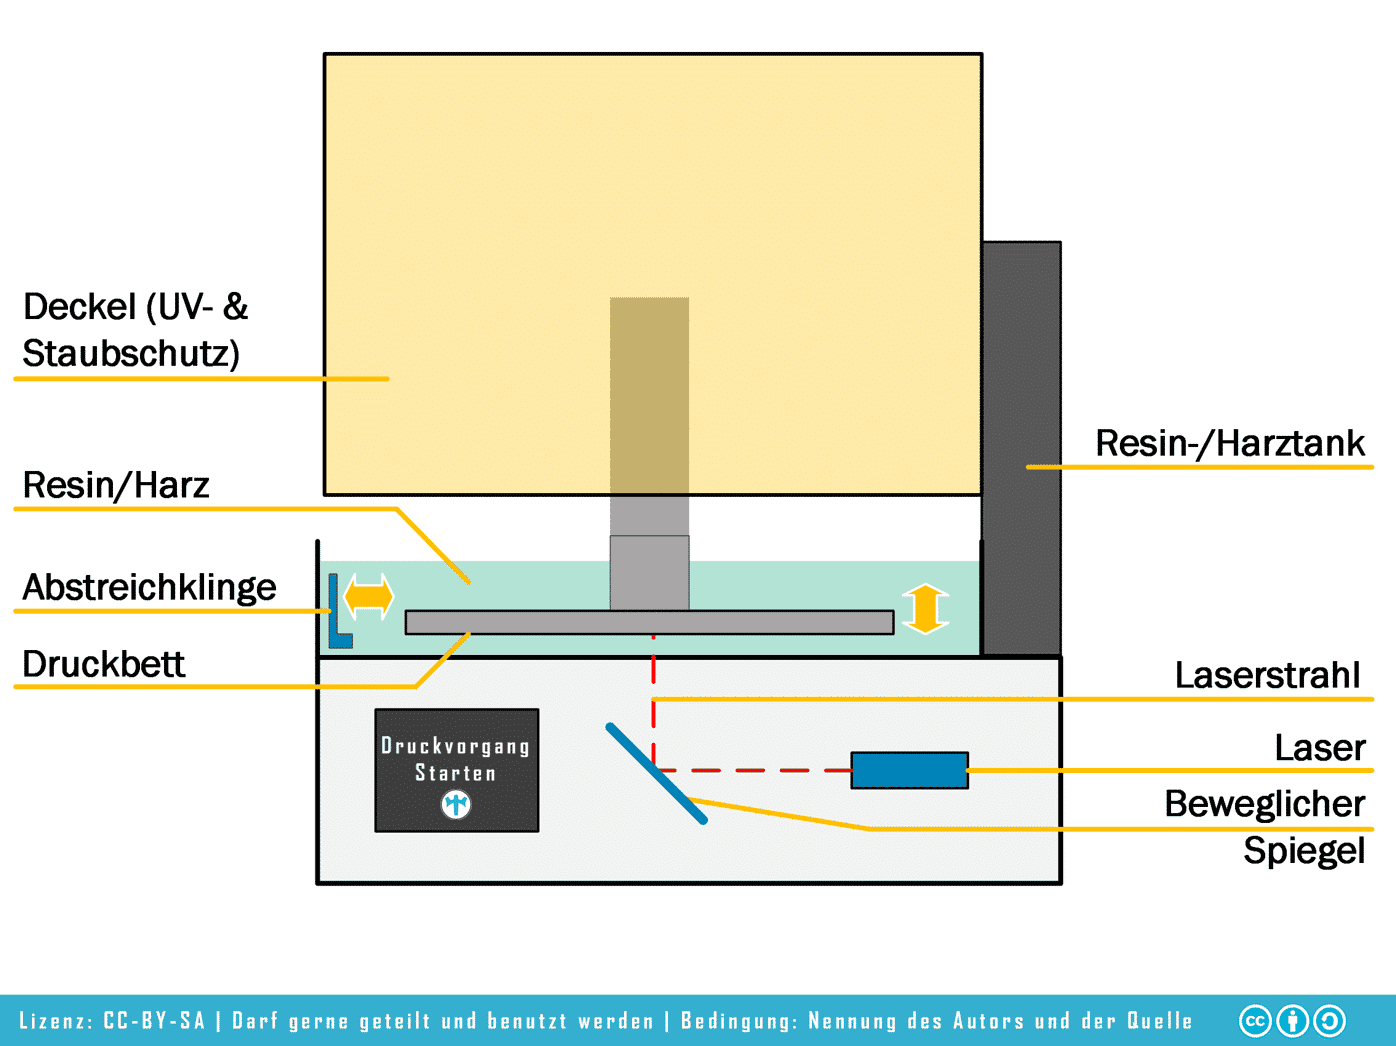
- Laser
- Movable mirrors
- Resin tank
- Container (Vat) – Filled with resin
- Lid with UV protection to prevent unwanted hardening of the resin by sunlight or electric light
- Scraper blade
- Print bed
How does the stereolithography process work?
In stereolithography or stereolithography, a 3D printed object is created from a liquid (photopolymer) resin by curing this resin layer by layer with pinpoint accuracy using a laser.
In this process, the laser beam is directed to the desired location via movable mirrors known as galvanometers. This is then cured.
Steps:
- Creation of the 3D model via CAD software, 3D scanner or download of a 3D print template
- Slicing the 3D model
- Fill tank with resin
- Close lid
- Start printing
- Building platform moves into the translucent tank with liquid resin
- The laser hardens the first layer
- Print bed lifts up by the desired layer thickness
- Resin fills the area below the object
- The laser now hardens this layer, which causes the previous layer and this layer to combine
- Occasionally, the print bed moves higher – Then the material in the tank is automatically “stirred” with a so-called scraper blade. This ensures that existing bubbles disappear and the resin is distributed evenly under the object. This ensures high print quality, without any gaps.
- This process is repeated layer by layer until the desired 3D object is completed.
Where is the SLA method used?
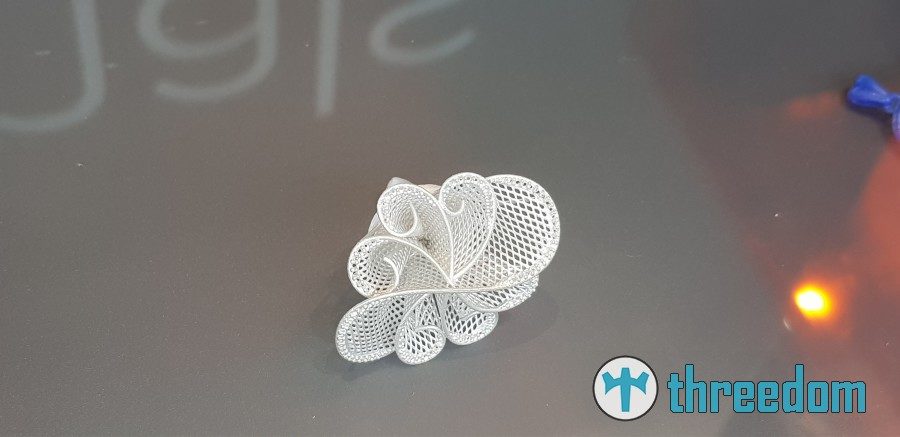
SLA printers produce high-precision parts with smooth surfaces and are widely used for highly detailed sculptures, jewelry molds and prototypes:
- Prototypes for simple functional tests
- Wax models for the production of objects from metal with the lost wax process
- Small batch production of end products with complex structures
- Models that require a high level of detail
- Tools for injection molding
- Medicine: dental splints, drilling templates for implants
- Visual prototypes for photo shoots and marketing tests
Which materials can be printed with the SLA process?
Nowadays, there is the right material for almost all purposes in the field of the SLA process:
- functional synthetic resin for high loads
- Flexible material
- Synthetic resin enriched with glass – for a smoother surface and the possibility to print thin walls stably
- Resilient resin for the production of prototypes that are subjected to great stresses, including snap-fits
- Heat-resistant material, for example, for the production of molds for injection molding for small series production.
- Castable material – This allows detailed models to be produced for investment casting. The material is “burned out” in the process
How is post-processing done in stereolithography?
These steps should always be carried out with extreme caution, because the resin is also more corrosive, depending on the material composition. Therefore, you should always wear gloves when handling objects that have not yet been cleaned and the printer and other components. The best way to do this is to wear safety goggles.
Better safe than sorry.
Remove print bed
All SLA printers offer the possibility to remove the print bed. This ensures easier removal of the printed objects. In addition, this reduces the risk of “hurting” yourself with the resin or contaminating the resin in the container.
Removing the support structures
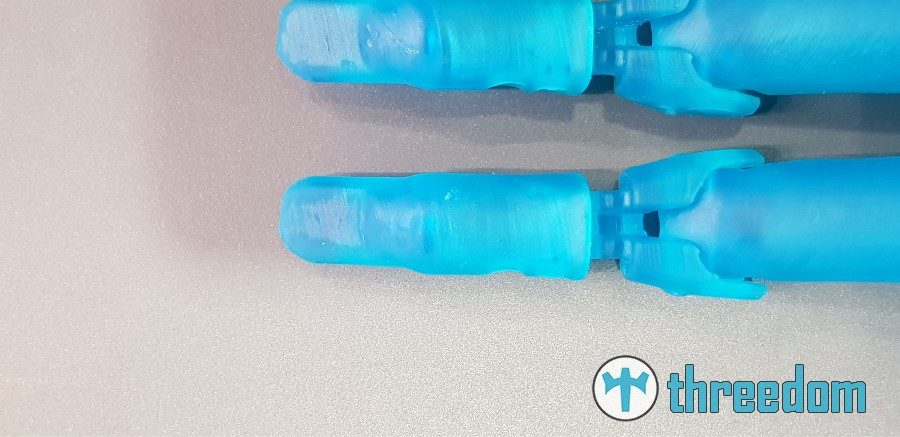
First, the support structures must be removed with a knife, pliers or other tool.
Cleaning process
There are several ways to do this. This depends on whether or not the existing SLA printer has some sort of cleaning station. If you have to do this yourself, the first step is to wash the object with alcohol. Then wash it under running water. You may also have to “scrub” at times, because the resin is very sticky and difficult to remove. Pay attention to filigree parts of the print object. These should be cleaned with care so that they do not break off.
Curing
The printed object is almost ready in the cleaned state, but in many cases still requires curing in order to fully develop the desired material properties. For this purpose, some manufacturers offer special UV stations. If you don't have any, you can, for example, resort to a nail hardener for “gel nails” and harden the object. Or the longest, but cheapest way: put the object on the windowsill and let the sun work. However, you have no guarantee that all areas are cured. Therefore rotate the object on the windowsill.
In addition to these sometimes necessary post-processing steps, the objects printed by stereolithghography can be processed by sandblasting, dyeing and coating, which in many cases makes them indistinguishable from products manufactured for series production using conventional methods.
Design for the SLA process. What to look out for?
This topic is too complex to accommodate here. Click on the link below to learn the most important tips & tricks:
Design for Stereolithography (SLA) – Guidelines for Good Design
Stereolithography – What are the advantages and disadvantages?
Each 3D printing process has advantages and disadvantages. Here I introduce you to those of stereolithography.
Advantages of the SLA process
- High accuracy
- No or barely visible layers
- Relatively fast process
- Large installation spaces possible
Disadvantages of the SLA procedure
- Relatively expensive process (printer, material, extras like tanks for each material etc.)
- Elaborate postprocessing
- Material selection comparatively small
- Curing increases print turnaround times
- Support structures are almost always needed
➡ Want more? Then have a look at other 3D printing methods in the article “3D printing methods – the overview of the most popular methods”.